How-to
How to Pay Independent Contractors in the United States
Paying independent contractors in the United States means setting clear contract terms, collecting the right tax forms, approving invoices, and.
By The surhires.com team · · 12 min read
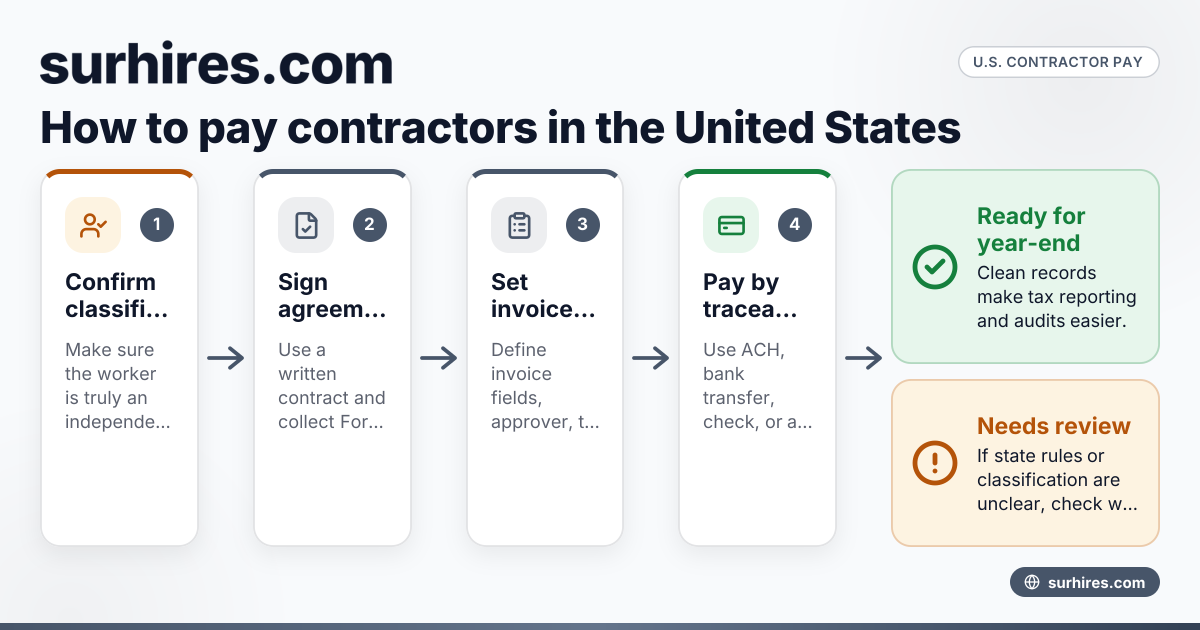
Paying independent contractors in the United States means setting clear contract terms, collecting the right tax forms, approving invoices, and sending payment through a traceable method. The best process is simple: confirm classification first, document the work, pay on schedule in USD ($), and keep records for taxes and audits.
Key takeaways
- To pay independent contractors in the United States, start with correct worker classification and a written agreement.
- Most businesses collect Form W-9 before the first payment and issue Form 1099-NEC when required.
- Common payment methods include ACH, bank transfer, check, and payment platforms that fit your accounting workflow.
- You should define invoice rules, approval steps, payment dates, and dispute handling before work begins.
- Good records matter. Keep contracts, invoices, payment confirmations, and tax documents in one place.
- If you are hiring across state lines, review state-specific rules with counsel or your accountant when needed.
What does it mean to pay an independent contractor in the United States?
Paying an independent contractor in the United States means paying a self-employed person or business for services under a contract, not through payroll. You usually do not withhold federal income tax, Social Security, or Medicare the way you would for a W-2 employee.
That sounds simple, but the process has a few important parts. You need to confirm the worker is truly an independent contractor. You need the right tax information. You need a payment method that your business can track. You also need records that support each payment if questions come up later.
For a small business in Chicago, Houston, or Detroit, this often comes down to a practical workflow. The contractor signs an agreement, submits a Form W-9, sends invoices, and gets paid through ACH or another approved method. Your team then records the payment in QuickBooks or your accounting system and handles year-end reporting.
If you are still deciding whether a worker should be a contractor or employee, review 1099 vs W-2 for Remote Workers in the United States. Classification mistakes create the biggest payment problems later.
How to pay independent contractors in the United States?
Pay independent contractors by following a repeatable process: confirm classification, sign a contract, collect Form W-9, approve invoices, pay by your chosen method, and keep records for tax reporting. If required, issue Form 1099-NEC after year-end.
That short answer covers the core workflow. The real value is building a process your finance team can use every time. Below is a practical step-by-step system.
1. Confirm the worker is truly an independent contractor
Before you send the first dollar, confirm the worker is not legally an employee. This matters because employees must be paid through payroll, with tax withholding and other obligations. Contractors are paid under a services agreement.
The key issue is control. If your business controls how, when, and where the person works, that can point toward employee status. If the worker runs an independent business, controls their own methods, and provides services under contract, that can support contractor status.
Do not treat classification as a paperwork exercise. A signed contract alone does not make someone a contractor. Your real working relationship matters.
For businesses hiring remote talent, How to Hire Remote Employees in the United States can help if you realize the role should be an employee position instead.
2. Use a written independent contractor agreement
A written agreement helps both sides understand the job and the payment terms. It should be signed before work starts.
Your agreement should usually cover:
- Scope of work
- Deliverables
- Payment amount or rate
- Invoice timing
- Payment due dates
- Expenses, if any
- Ownership of work product
- Confidentiality terms
- Dispute process
- Termination terms
Keep the language specific. “Marketing support” is vague. “Create four email campaigns and one landing page by 11/15/2026” is clear. Clear scope reduces invoice disputes and late payments.
3. Collect Form W-9 before the first payment
For most U.S. contractor relationships, you should collect Form W-9 before paying the contractor. This form gives you the contractor’s legal name, business name if applicable, address, and taxpayer identification number.
Do this early. Waiting until January is a mistake. If your team pays a contractor all year and then cannot get tax details, year-end reporting becomes harder.
Store Form W-9 securely. It contains sensitive information. Limit access to your finance team and anyone who handles vendor onboarding.
4. Set your invoice and approval rules
Contractor payment problems often start because no one defines the invoice process. Make the rules clear before work begins.
Decide:
- Whether invoices are required for every payment
- What each invoice must include
- Where invoices should be sent
- Who approves them
- How long approval takes
- When payment is due after approval
For example, a Houston manufacturing company might require invoices to include a purchase order number, service dates, and project code before accounts payable can process payment. A Chicago agency might approve invoices through a department lead and pay twice a month.
Keep the process easy to follow. Contractors should know exactly what triggers payment.
5. Choose a payment method your business can track
The best payment method is one that is reliable, documented, and easy to reconcile in your books. Most businesses in the United States use one of these options:
ACH or direct bank transfer
ACH is often the simplest option for recurring contractor payments. It creates a bank record, works well with accounting workflows, and is familiar to most businesses.
Paper check
Some businesses still pay by check, especially if they already use check runs through accounts payable. This is slower, but it creates a clear paper trail.
Wire transfer
Wire transfers are usually used less often for domestic contractor payments because they can cost more. They may make sense in urgent or high-value situations.
Payment platforms
Some businesses use payment platforms to send contractor payments and sync records with accounting software. If you use one, make sure it fits your approval process and bookkeeping needs.
Whichever method you choose, use the same method consistently when possible. Consistency reduces errors and makes audits easier.
What information should you collect before paying a contractor?
Collect the signed contract, Form W-9, payment details, contact information, and any documents needed for your approval process. You should also confirm who approves the work and what the invoice must show.
Once you have the basics, build a standard onboarding checklist. A good checklist reduces last-minute issues and protects your business if the contractor relationship changes later.
A simple contractor onboarding checklist
Before the first payment, gather:
- Signed independent contractor agreement
- Completed Form W-9
- Legal business name or individual name
- Mailing address
- Email and phone number
- Bank details or preferred payment method
- Scope of work or statement of work
- Internal approver name
- Required invoice fields
- Any confidentiality or security documents
If the contractor will access customer data or systems, your business may also need security review steps. For example, a B2B software company may want vendor access controls because customers often expect strong data handling practices, including SOC 2-minded controls.
Step-by-step process for paying independent contractors
The easiest way to manage contractor payments is to use one repeatable workflow. This helps owners, operations teams, and finance staff stay aligned.
1. Onboard the contractor
Create a standard intake process. Get the contract signed. Collect Form W-9. Confirm payment details. Assign an internal owner for the relationship.
2. Confirm work terms
Make sure both sides understand the rate, milestones, deadlines, and invoice timing. If there are reimbursable expenses, define what counts and what receipts are required.
3. Receive the invoice
Require the contractor to submit an invoice by email or through your accounts payable process. The invoice should match the scope of work and include service dates and the amount due.
4. Review and approve
The person who requested the work should review the invoice. Finance should confirm the numbers, vendor details, and payment terms before release.
5. Send payment
Pay using your approved method, such as ACH or check. Save the payment confirmation in the same file as the invoice and contract.
6. Record the transaction
Enter the payment in QuickBooks or your accounting system. Tag it to the right expense account, project, or department.
7. Handle year-end reporting
Review total payments made during the year and determine whether a Form 1099-NEC is required. Your accountant or tax advisor can help with edge cases.
This process works for many companies, from a Detroit design firm to a Texas field service business. The key is discipline. If even one step gets skipped, clean-up takes longer later.
How often should you pay independent contractors?
Pay independent contractors on the schedule stated in the contract, such as per project, per milestone, weekly, or net 15 or net 30 after invoice approval. The best schedule is one both sides understand and can follow consistently.
The payment cadence depends on the work. A freelance designer may invoice per project. A part-time operations consultant may invoice twice per month. A software developer may bill at the end of each milestone.
Common contractor payment schedules
Per project
This works well for fixed-scope deliverables. You agree on a total price and pay when the project is complete or at defined milestones.
Hourly or daily
This is common when the scope may shift. The contractor tracks time and invoices based on agreed rates.
Milestone-based
Milestone billing is useful for larger engagements. For example, a business might pay 30% at kickoff, 40% after a prototype, and 30% at final delivery.
Net terms after invoice
Many businesses use net terms, such as net 15 or net 30, starting after invoice approval. This gives finance a predictable schedule.
Choose one structure and document it clearly. Unclear timing causes friction even when the amount is correct.
Taxes and reporting for contractor payments
Taxes are one of the main reasons businesses ask how to pay independent contractors in the United States correctly. The payment itself is only part of the issue. Reporting matters too.
In general, businesses paying independent contractors do not handle withholding the same way they do for employees. But they often do need to collect tax information and may need to issue an information return.
Form W-9 and Form 1099-NEC
Form W-9 is collected from the contractor. It gives you the taxpayer details needed for reporting.
Form 1099-NEC is commonly used to report certain nonemployee compensation when required. Review current IRS instructions and work with your accountant to confirm when filing applies for your situation.
Keep clean year-end records
By year-end, you should be able to answer these questions quickly:
- Who did we pay?
- How much did we pay?
- What was each payment for?
- Do we have the contractor’s tax information?
- Do we need to issue a Form 1099-NEC?
This is where strong records save time. If your books are current and every payment is tied to an invoice, year-end work is much easier.
Common mistakes businesses make when paying contractors
Many payment issues are avoidable. They usually come from weak onboarding, weak documentation, or treating contractor payments casually.
Misclassifying workers
This is the biggest mistake. If someone should be an employee, paying them as a contractor creates tax and compliance risk.
Paying without a contract
A verbal agreement can create confusion about rates, deliverables, and ownership of work product.
Forgetting Form W-9
This creates tax reporting problems later and can delay year-end filing work.
Using inconsistent payment methods
Paying one invoice by check, another by transfer, and another through a personal app makes reconciliation harder. Business payments should stay in business systems.
Approving vague invoices
Invoices should show what was done, when, and for how much. Vague billing invites disputes.
Poor recordkeeping
Keep everything in one place. Store contracts, invoices, approvals, and payment confirmations together.
If you want more practical hiring and operations guidance, browse the surhires.com blog.
A simple internal policy for contractor payments
A short written policy helps your team pay contractors the same way every time. It does not need to be complicated.
Your internal policy can include:
- Who can hire a contractor
- Who must approve the contract
- What onboarding documents are required
- Which payment methods are allowed
- Invoice submission rules
- Approval deadlines
- Record retention practices
- Year-end tax reporting owner
For example, a policy might say that all contractors must sign an agreement, submit Form W-9, and invoice by email before the 25th of each month for payment on the first Friday of the next month. That kind of clarity helps both finance and operations.
Can AI help manage contractor payments?
Yes. AI can help organize invoices, flag missing fields, route approvals, and suggest coding for bookkeeping. But ai how you use it matters more than the tool itself. You still need human review for classification, contracts, taxes, and final payment approval.
Used well, automation can reduce manual work. For example, your team can use structured invoice intake, document extraction, and reminders for missing forms. But you should not rely on automation alone for legal or tax decisions. Human judgment still matters.
Where automation helps most
The best use cases are operational:
- Checking whether an invoice has required fields
- Matching invoices to contracts or purchase orders
- Notifying approvers about pending bills
- Syncing payment data into QuickBooks
- Creating a year-end checklist for tax reporting
That is the practical answer to the ai how question in contractor payments. Use automation for speed and consistency, not as a substitute for finance or legal review.
When should you ask an accountant or lawyer for help?
Some contractor payment setups are simple. Others are not. Ask for help when the facts are unclear or the stakes are higher.
You should get advice when:
- You are unsure whether the worker is a contractor or employee
- The contractor works in a heavily regulated function
- The engagement involves sensitive customer data
- The payment structure is unusual
- You are behind on records or tax forms
- Multiple states may be involved
A short review early can prevent much larger problems later.
Final checklist: how to pay independent contractors in the United States
Use this quick checklist when building or reviewing your process:
- Confirm contractor classification
- Sign a written agreement
- Collect Form W-9
- Set invoice requirements
- Choose an approved payment method
- Review and approve invoices
- Pay on the agreed schedule
- Record payments in your accounting system
- Keep contracts, invoices, and confirmations together
- Review year-end reporting needs, including Form 1099-NEC where required
Published 7 October 2026
See Surhires on a live requisitionMore from the blog
What Is a Contractor of Record in the United States?
A contractor of record in the United States is a service provider that helps a business engage and manage independent contractors through a compliant.
8 October 2026 · 12 min read
How to Onboard Remote Contractors in the United States
Remote contractor onboarding in the United States means giving a contractor everything they need to start work quickly, legally, and securely without.
8 October 2026 · 12 min read
How to Hire 1099 Contractors in the United States
Hiring 1099 contractors in the United States means engaging self-employed workers for defined services without putting them on payroll as employees.
8 October 2026 · 12 min read